[AWS Amplify・Vue 3] AWS Amplifyで匿名掲示板を作ってみる
前にAws Amplifyで匿名掲示板を作った。だが、古くなってきたのと自分の理解も進んだので最初から書き直すことにした。
作成環境は、@aws-amplify/cli@5.1.0、@vue/cli@4.5.13、vue3(Composition API)、普通のjavascript。SSGやSSRもAmplifyではできるが、今回はSPAでいく。
スレッド(話題)ページとそれに紐付いたコメントを名無しで書けるサイト、というイメージで作ろうと思う。書き込みのバリデーションや認証はしない。

プロジェクトの作成
まずはcliをアップデート。vueもアップデートする。
npm install -g @aws-amplify/cli
npm install -g @vue/cli
vueでvue 3 プロジェクトを作る。
PS C:\Users\haseg> vue create tokumei5

Vue CLI v4.5.13
? Please pick a preset: Manually select features
? Check the features needed for your project: Choose Vue version, Babel, Router, Linter
? Choose a version of Vue.js that you want to start the project with 3.x
? Use history mode for router? (Requires proper server setup for index fallback in production) Yes
? Pick a linter / formatter config: Basic
? Pick additional lint features: Lint on save
? Where do you prefer placing config for Babel, ESLint, etc.? In dedicated config files
? Save this as a preset for future projects? No
amplify init をする。(amplifyを初めて触る人はamplify configureをしてから)
PS C:\Users\haseg\tokumei5> amplify init

? Enter a name for the project tokumei5

Project information
| Name: tokumei5
| Environment: dev
| Default editor: Visual Studio Code
| App type: javascript
| Javascript framework: vue
| Source Directory Path: src
| Distribution Directory Path: dist
| Build Command: npm.cmd run-script build
| Start Command: npm.cmd run-script serve

? Initialize the project with the above configuration? Yes
これでブラウザでAWSのAmplify Consoleにアクセスして、右上のリージョンを東京に変更する。今回作ったamplifyアプリが登録されている。
Githubの連帯
次にGitレポジトリをAmplify Consoleに紐付ける。そうすると、Githubにプッシュすると自動でデプロイするといったことができる。
この設定はあとから行うとビルドできなくて原因を見つけるのも大変、といった状況になりやすいので、プロジェクトの最初にやっておいたほうが良い。
まずgitのレポジトリを作って、githubにパブリッシュする。自分はgithubデスクトップ使っているんだけど、ここは個人個人の環境のやり方で。
次にaws amplifyのページに戻ってfrontend enviromentからgithubを選択。github認証をすると、レポジトリが一覧に出るので、選択。
環境はdevを選択、デプロイするroleをなければ作る。ビルドコマンドは検出して自動で作られる。あとはクリックしていくとビルドしてデプロイする。
成功の文字が出たあと、作成されたアドレスをクリックすると、vueのサンプルプロジェクトがデプロイされているのがわかる。
Amplifyライブラリを読み込む
作成したプロジェクトに戻り amplify ライブラリをインストールとimportする
npm install aws-amplify @aws-amplify/ui-componentsmain.jsで読み込み。
import { createApp } from "vue";
import App from "./App.vue";
import router from "./router";

import Amplify from "aws-amplify";
import aws_exports from "./aws-exports";
import {
  applyPolyfills,
  defineCustomElements,
} from "@aws-amplify/ui-components/loader";

Amplify.configure(aws_exports);
applyPolyfills().then(() => {
  defineCustomElements(window);
});

createApp(App)
  .use(router)
  .mount("#app");
次にamplify cliを使い、プロジェクトにAmplifyによるAPI(GraphQL)を追加する
PS C:\Users\haseg\tokumei5> amplify add api
? Please select from one of the below mentioned services: GraphQL
? Provide API name: tokumei5
? Choose the default authorization type for the API API key
? Enter a description for the API key:
? After how many days from now the API key should expire (1-365): 365
? Do you want to configure advanced settings for the GraphQL API No, I am done.
? Do you have an annotated GraphQL schema? No
? Choose a schema template: One-to-many relationship (e.g., “Blogs” with “Posts” and “Comments”)
Graph QLスキーマ ファイルを編集する
Graph QLスキーマを編集する前に、前の記事で紹介した@autoトランスフォーマーをインストールと設定する。
npm install graphql-auto-transformer -Damplify/backend/api/{{api name}}/transform.conf.jsonを編集
{
    "Version": 5,
    "ElasticsearchWarning": true,
    "transformers": [
        "graphql-auto-transformer"
    ]
}
上記を設定するとスキーマで@autoというカスタムdirectiveが使えるようになる。だがカスタムdirectiveを使う場合、ビルドプロセスを変更する必要があるようだ。ブラウザでAWS Amplifyのアプリページを開き、ビルド設定からビルドコマンドを変更する
version: 1
backend:
  phases:
    build:
      commands:
        - npm install -g graphql-auto-transformer
        - '# Execute Amplify CLI with the helper script'
        - amplifyPush --simple
上記のビルドコマンドはプロジェクトで管理することもできる。コピーしてルートフォルダにamplify.ymlという名前で保存するとamplifyコンソールが自動で認識する。
ローカルに戻って次にGraph QLスキーマを書く。
スレッドを表すThread型、コメントを表すComment型を作る。
前の記事で書いた作成時間でソートされるようにする技を使っている。
type Thread
  @model
  @key(
    name: "byTypeCreatedAt"
    fields: ["type", "createdAt"]
    queryField: "byCreatedAt"
  ) {
  id: ID!
  type: String!
  title: String!
  comments: [Comment] @connection(keyName: "byThread", fields: ["id"])
  createdAt: AWSDateTime! @auto
}

type Comment @model @key(name: "byThread", fields: ["threadId", "createdAt"]) {
  id: ID!
  title: String!
  threadId: ID!
  createdAt: AWSDateTime! @auto
}
amplify pushをしておく。これでAPI(GraphQL)の用意はできた。
Vue 3コードを書いていく
ここからVueのコードを書いていく。
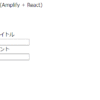
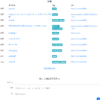
仕様としては、ホーム画面でスレッド一覧を取得して、スレッド名をクリックすると、スレッドのページに移動して、コメントの一覧を取得する。
Home画面
<template>
  <div class="threadList">
    <table>
      <thead>
        <tr>
          <th>スレッド名</th>
          <th>作成日</th>
        </tr>
      </thead>
      <tbody>
        <tr v-for="thread in threadList" :key="thread.id">
          <td>
            <div>
              <router-link :to="thread.id">
                {{ thread.title }}
              </router-link>
            </div>
          </td>
          <td>
            {{ thread.createdAt }}
          </td>
        </tr>
      </tbody>
    </table>
  </div>
  <div class="createThreadForm">
    <form @submit.prevent="onSubmitForm">
      <h3>スレッドを作成する</h3>
      <div>
        <div>
          <label for="title">スレッド名</label>
        </div>
        <input id="title" v-model="createThreadForm.title" />
      </div>
      <div>
        <div>
          <label for="comment">最初のコメント</label>
        </div>
        <textarea id="comment" v-model="createThreadForm.firstComment">
        </textarea>
      </div>
      <input class="button" type="submit" value="送信" />
    </form>
  </div>
</template>

<script>
import { API } from "aws-amplify";
import { byCreatedAt } from "../graphql/queries.js";
import { createComment, createThread } from "../graphql/mutations.js";
import { ref, reactive, onMounted } from "vue";

import { defineComponent } from "vue";

export default defineComponent({
  setup() {
    // スレッドの一覧
    const threadList = ref([]);
    // スレッド作成フォーム
    const createThreadForm = reactive({ title: "", firstComment: "" });
    const errorMessage = ref("");

    // スレッド一覧の取得
    const getThreadList = async () => {
      const { data } = await API.graphql({
        query: byCreatedAt,
        variables: { type: "t", sortDirection: "DESC" },
      });
      console.log("getThread : ", data);
      threadList.value = data.byCreatedAt.items;
    };

    // 作成フォームをクリック時の挙動
    const onSubmitForm = async () => {
      // 片方でも空だったら終了
      if (!createThreadForm.title || !createThreadForm.firstComment) return;
      const newThread = await createNewThread();
      await createFirstComment(newThread.id);
      clearForm();
    };

    // スレッドの作成
    const createNewThread = async () => {
      const { data } = await API.graphql({
        query: createThread,
        variables: {
          input: {
            type: "t", // ソートするために同じ値を入れる
            title: createThreadForm.title,
          },
        },
      });
      console.log("createNewThread :", data);
      unshiftThreadToList(data.createThread);
      return data.createThread;
    };

    // スレッド最初のコメントの作成
    const createFirstComment = async (threadId) => {
      const res = await API.graphql({
        query: createComment,
        variables: {
          input: { threadId: threadId, title: createThreadForm.firstComment },
        },
      });
      console.log("createFirstComment :", res);
    };

    // 新しいスレッドをリストの先頭に追加する
    const unshiftThreadToList = (newThread) => {
      threadList.value.unshift(newThread);
    };

    // フォームをクリアする
    const clearForm = () => {
      createThreadForm.title = "";
      createThreadForm.firstComment = "";
    };

    onMounted(getThreadList);

    return { threadList, createThreadForm, errorMessage, onSubmitForm };
  },
});
</script>
スレッド名をクリックしたときのページ
<template>
<template>
  <div class="thread">
    <router-link to="/">タイトルに戻る</router-link>
    <h2>{{ thread.title }}</h2>
    <div v-for="comment in thread.comments.items" :key="comment.id">
      <div>{{ comment.title }}</div>
    </div>
  </div>
  <div class="commentForm">
    <form @submit.prevent="onCommentForm">
      <h3>コメントする</h3>
      <div>
        <label for="title">新しいコメント</label>
      </div>
      <div>
        <input id="title" v-model="createCommentForm.content" />
      </div>
      <div><input class="button" type="submit" value="Submit" /></div>
    </form>
  </div>
</template>

<script>
import { useRoute } from "vue-router";
import { defineComponent, onMounted, reactive, ref } from "vue";
import { API } from "aws-amplify";
import { getThread } from "../graphql/queries";
import { createComment } from "../graphql/mutations";

export default defineComponent({
  setup() {
    const route = useRoute();

    const isNotFoundError = ref(false);
    const threadId = ref("");
    const thread = reactive({ title: "", comments: { items: [] } });
    const createCommentForm = reactive({ content: "" });

    //コメントフォームをクリック時
    const onCommentForm = async () => {
      if (!createCommentForm.content) return;
      await createNewComment();
    };

    // 新しいコメントを作成
    const createNewComment = async () => {
      const { data } = await API.graphql({
        query: createComment,
        variables: {
          input: { threadId: threadId.value, title: createCommentForm.content },
        },
      });
      console.log(data);
      pushCommentToList(data.createComment);
    };

    // ページの表示
    const viewThread = async () => {
      threadId.value = route.params.threadId;
      console.log(threadId.value);
      try {
        await getThreadAPI();
      } catch (e) {
        console.error(e);
      }
    };

    // list にコメントを追加する
    const pushCommentToList = (newComment) => {
      thread.comments.items.push(newComment);
    };

    // スレッドの取得
    const getThreadAPI = async () => {
      const { data } = await API.graphql({
        query: getThread,
        variables: { id: threadId.value },
      });
      console.log(data);
      Object.assign(thread, data.getThread);
    };

    onMounted(viewThread);

    return { onCommentForm, isNotFoundError, thread, createCommentForm };
  },
});
</script>
ここまでで以下のようになる

ここまでで大体のところまではできた。
subscription
次にスレッドで誰かがコメントを書き込むと、自動で画面が更新するようにsubscriptionを設定する。
GraphQLスキーマを開く。
AmplifyのGraphQLでは、@modelと付けることでonCreateCommnetなどのサブスクリプションが自動で生成されている。
しかしそのままの設定だと、別のスレッドに書いたコメントも受信してしまう。
スレッドごとに指定して受信するには、下記のように引数のあるSubscriptionをスキーマに作り新しいSubscriptionを作ることを明示する必要がある。今回引数にしたのはComment型にあるthreadIdである。
type Subscription {
  onCommentByThreadId(threadId: ID!): Comment
    @aws_subscribe(mutations: ["createComment"])
}
そしてamplify push。
Vueのコードに戻り、スレッドページで受信するよう記述する。
    // サブスクリプション設定
    const setSubscription = () => {
      createCommentSubscription.value = await API.graphql({
        query: onCommentByThreadId,
        variables: {
          threadId: threadId.value,
        },
      }).subscribe({
        next: (data) => {
          const newComment = data.value.data.onCommentByThreadId;
          console.log("newComment: ", newComment);
          // コメントが無ければ追加
          const idx = thread.comments.items.findIndex(
            (comment) => comment.id === newComment.id
          );
          console.log("idx :", idx);

          if (!(idx === -1)) return;
          pushCommentToList(newComment);
        },
      });
    };

    const unSubscription = () => {
      createCommentSubscription.value.unsubscribe();
      console.log("unsubscribe");
    };

    onUnmounted(unSubscription);
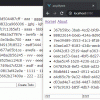
別ブラウザでスレッドページを開いて、コメントを書くと元ブラウザのページも変化していることがわかる。

githubにpushしてデプロイまで動くか確認する。
リダイレクト設定
サイトにアクセスしてみて、スレッドページに移動してリロードする。するとエラーページが出てくる。それはSPA用リダイレクト設定が完了していないからだ。
Amplify consoleのアプリページの左の欄に書き換えてリダイレクトという変な訳の欄がある。
そこから以下のように設定
| 元の住所 | 宛先アドレス | リダイレクトタイプ | 国コード |
|---|---|---|---|
</^[^.]+$|\.(?!(css|gif|ico|jpg|js|png|txt|svg|woff|woff2|ttf|map|json)$)([^.]+$)/> | /index.html | 200 |
https://docs.aws.amazon.com/amplify/latest/userguide/redirects.html
これでエラーは出なくなる。
Element Plusを使ってみる
あとは適当に装飾して終わろう。
Vue用のGUIフレームワークとして、Vuetifyを使いたかったがVue3への対応はまだまだのようだ。使いたいコンポーネントがまだ移行していなかった。適当にVue3対応のものを検索して見つけたElement Plusを使ってみる。
この部分は別記事にしようかな。コンポーネントは揃っているが機能は少ない。Bootstrapに似ている。styleをいじって調整するようだがサンプルコードも少なく、苦手なのもありあまり使いこなせてない。
見た目は以下のようになった。

公開アドレスは
https://main.d3rxxsw0p83qxs.amplifyapp.com/
Githubは
https://github.com/opvelll/tokumeiAmplify2
まとめ
とりあえずここまで。
AWSAmplifyとVue3を使って匿名掲示板を作った。前回から主に、カスタムdirectionを使ったときビルドコマンドを書き換えないとビルドが落ちること、subscriptionをフィルターして受け取る方法、createdAtでソートする方法、に対応した。落とし穴だらけですわ。
Vue3 Composition APIはシンプルで使いやすそう。Vue3対応のGUIフレームワークはまだいろいろ試してみようと思う。
VueのAmplify API使っているところとか、プロトタイプ作ろうとしたときとかコピペして使いまわそうかなと思っている。


ディスカッション
コメント一覧
まだ、コメントがありません